If you don't know where to start with motion graphics, check out my column "Quick Tip." I'll show you how to create some awesome effects using Adobe Creative Suite and other tools.
I'm a big fan of Laika's stop-motion films, especially 2016's "Kubo and the Two Strings." You have to respect how much time those animators take in creating each puppet and posing them in front of a camera.
If you're not working with physical puppets, there's a less painful way of animating characters in Adobe After Effects. It's through character rigging, which is the process of creating a skeletal frame for your characters so they can be easily manipulated later on.
You'll learn how to rig characters in Adobe After Effects using DUIK, a free plugin that allows you to easily animate movement.
If you’ve gone through my previous lesson on the 2.5D effect, you might ask “why should we bother using DUIK when we have Puppet Pin tool in Adobe After Effects?”
That’s because DUIK can build a bone structure for your character and emulate the natural movement of limbs. It’ll make more sense as we go through this lesson.
1. DESIGN YOUR CHARACTER
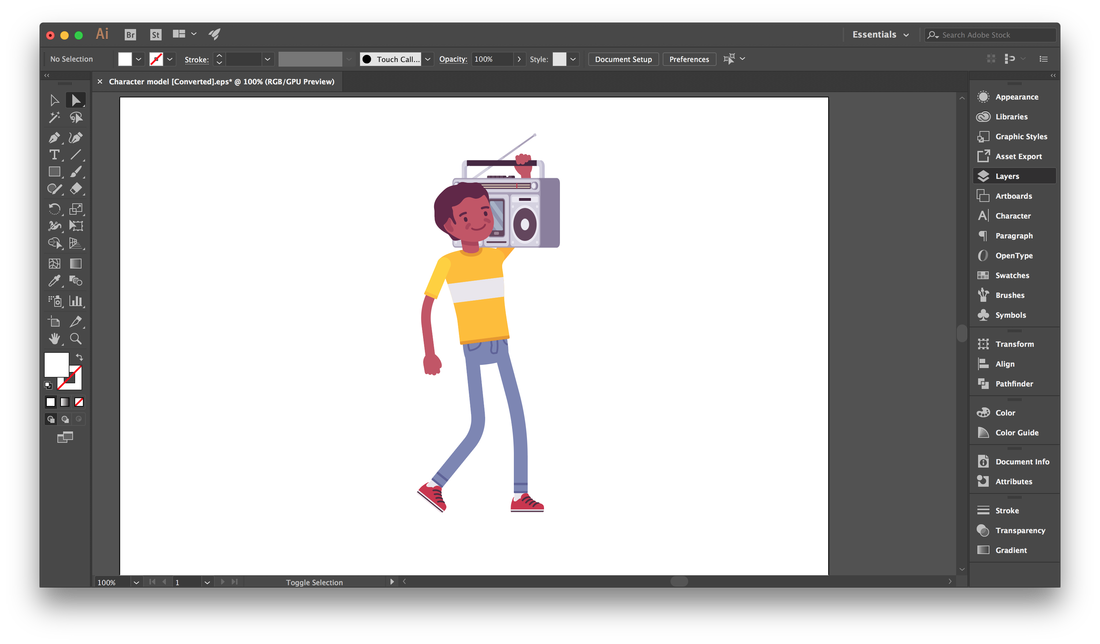
The first thing you need to do is create your character. I use Adobe Illustrator to design my characters because it can scale my illustrations without any loss in quality.
Make sure each of your character’s limbs and features — think hands and feet, eyes and noses — are in separate layers. Doing so will make them easier to manipulate in Adobe After Effects.
I downloaded this ready-made character from Shutterstock for this lesson. Let’s call him Joe.
Each of Joe’s features can be articulated individually in Adobe Illustrator. He's only going to walk in this lesson, so I’ve created layers for his upper body and each of his legs and feet.
2. IMPORT YOUR CHARACTER
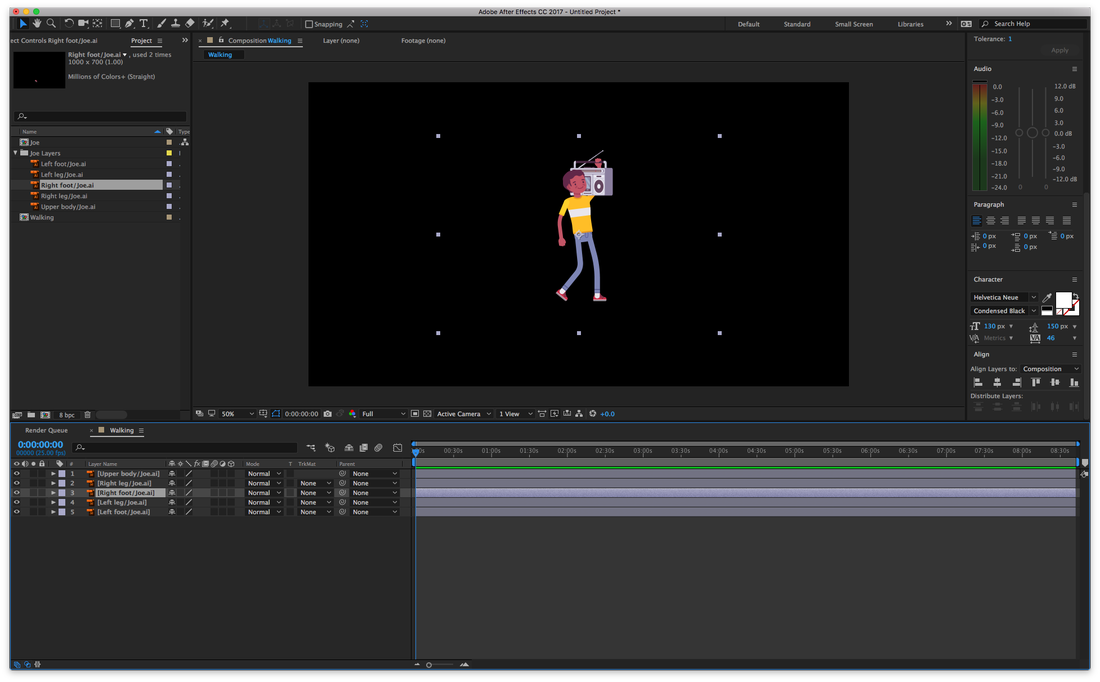
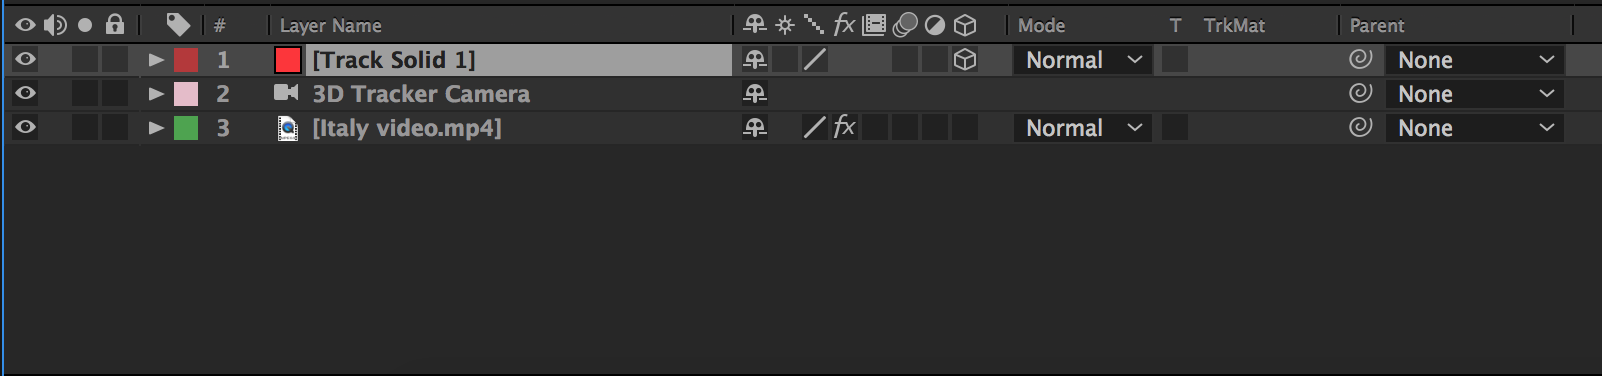
Each of your layers should appear as separate Adobe Illustrator files when you import your character into Adobe After Effects. Drag these onto your timeline and arrange them.
Each of your layers should appear as separate Adobe Illustrator files when you import your character into Adobe After Effects. Drag these onto your timeline and arrange them.
3. CREATING BONES FOR YOUR CHARACTER
|
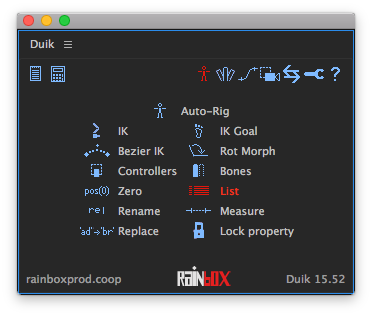
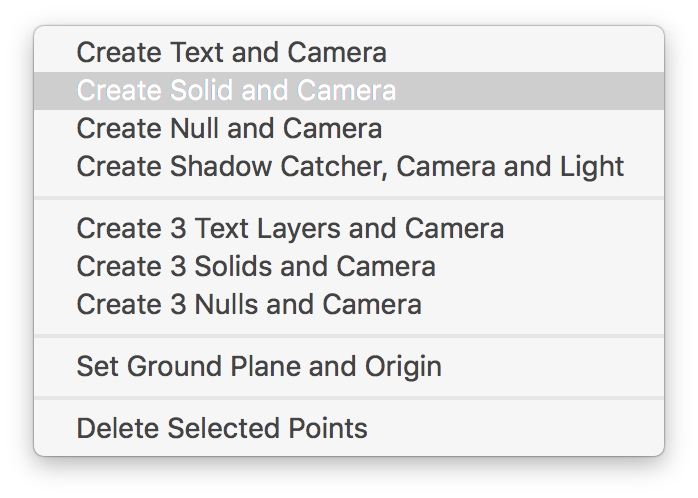
Open up the DUIK window. You can find it by clicking on Window in the top menu bar and then clicking on Duik.jsx. You can also look it up by clicking on Help in the top menu bar, typing “DUIK” in the search entry and clicking on Duik.jsx when it appears in the drop-down menu.
|
|
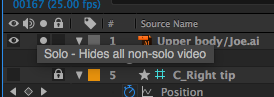
To make this next step easier, you might want only one of the legs to be visible. To do this, click on the box that’s next to your chosen layer and under the Solo column.
|

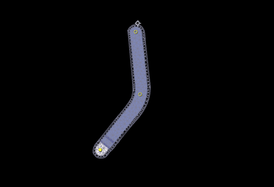
Click on the Puppet Pin tool in the toolbar at the top of your Adobe After Effects window. It’s the one that looks like — duh — a pin. In the Project window, click on the leg to place Puppet Pins. You'll need to set three down for the butt, knee and ankle as shown in the image below.
|
|
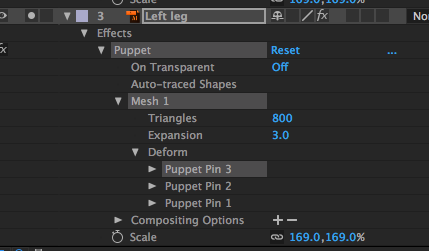
Twirl down that leg's layer and open up the Effects option, then the Puppet option, then the Mesh 1 option and then the Deform option. The three Puppet Pins you set down earlier should appear here.
Highlight those Puppet Pins and select Bones in the DUIK window. This should create three Null objects for each pin. Rename these objects to butt, knee and ankle.
Highlight those Puppet Pins and select Bones in the DUIK window. This should create three Null objects for each pin. Rename these objects to butt, knee and ankle.

You need to create Null objects for these pins so you can parent them to each other. Under the Parent column, make the ankle object the parent of the knee object and the knee object the parent of the butt object.
4. CREATING A CONTROLLER FOR YOUR CHARACTER’S LIMB
The next step involves creating another Null object you can use to manipulate the leg without it contorting into weird, unnatural shapes.
4. CREATING A CONTROLLER FOR YOUR CHARACTER’S LIMB
The next step involves creating another Null object you can use to manipulate the leg without it contorting into weird, unnatural shapes.
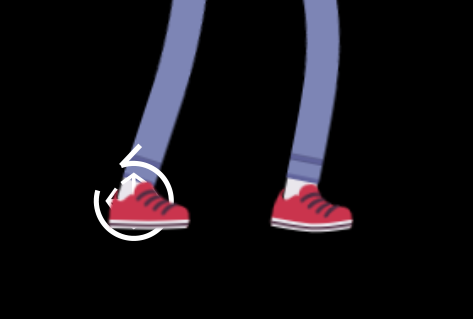

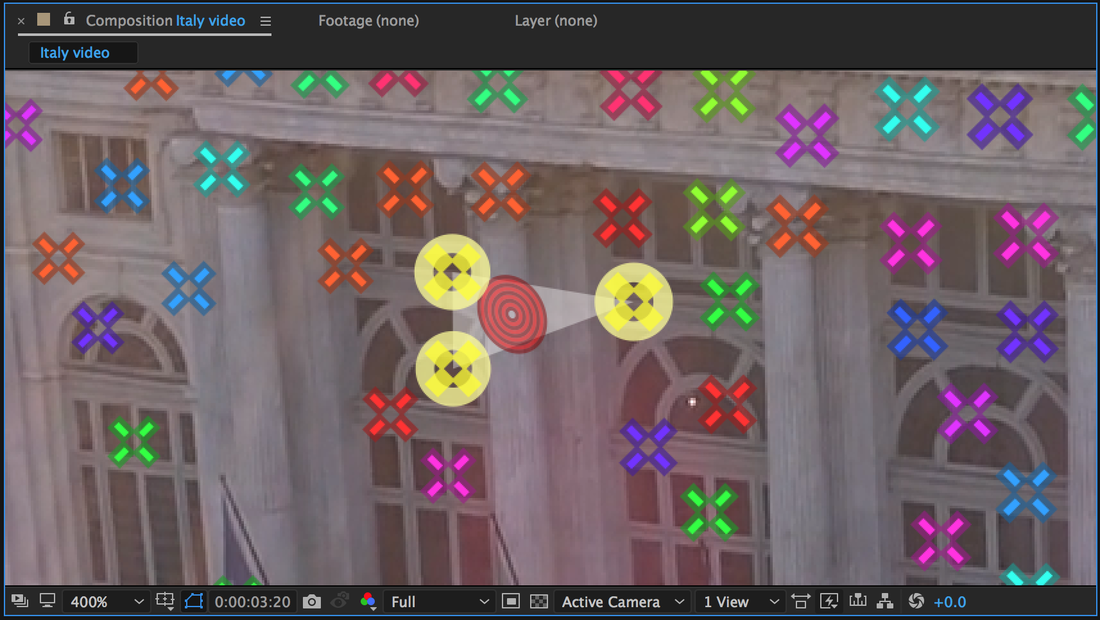
Highlight the ankle null object and click Controllers in the DUIK window. Click Create in the window that appears, and it should create a controller you can move around to manipulate the ankle. It’ll appear as a white circle with arrows above the ankle in your project window, as shown in the image above.
|
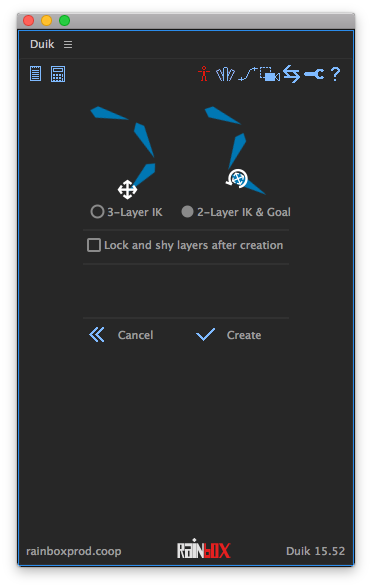
You then need to highlight the ankle, knee and butt null objects and the controller and click IK, or Inverse Kinematics. Select 2-Layer IK & Goal and click Create. Now, if you move the controller, you’ll find that the rest of the leg moves along with it in a natural motion.
Repeat the last two steps for the other leg and the feet, creating points for the tip, base and heel instead. After you’re done, make sure to connect your legs and feet by parenting the left ankle null object to the left heel null object and the right ankle null object to the right heel null object. |
5. ANIMATING THE WALK CYCLE OF YOUR CHARACTER
Remember the Solo option I talked about earlier? Use that to make the controllers the only visible layers in your timeline.
Remember the Solo option I talked about earlier? Use that to make the controllers the only visible layers in your timeline.
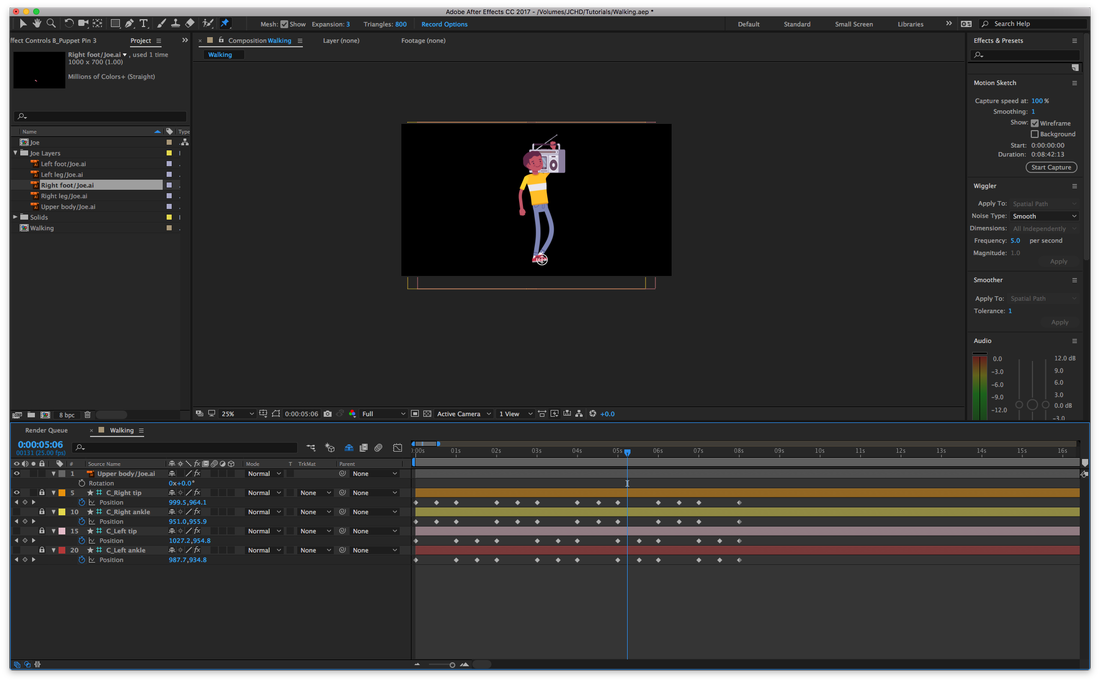
Open up the Position options for each of these controllers and begin setting down keyframes. You can also click and drag on the circle controller markers in the Project window to change the positions of the legs and feet.
It can be a bit confusing at first getting a walk cycle that looks natural. I recommend looking up “walk cycle” in any image search engine for reference.
Remember that it’s not as simple as moving your character’s foot from Point A to Point B. If you do that, your character will just be sliding their feet back and forth.
Take a look at Joe. Joe needs to lift his feet up before he can set it down in front of him. Animate your character with that in mind.
Once you render it out, your graphic should look something like this.
That's all there is to building a bone structure for your character using DUIK. I recommend rigging your character's arms and upper body as well, so that she or he doesn't look as stiff as Joe does in the animation above.
There you have it! It's nothing compared to what Laika's done with their films but, for the beginner animator, this is a good place to start.
I'll be back again in two weeks for another lesson. Until then, have fun animating!
There you have it! It's nothing compared to what Laika's done with their films but, for the beginner animator, this is a good place to start.
I'll be back again in two weeks for another lesson. Until then, have fun animating!

 RSS Feed
