If you don't know where to start with motion graphics, check out my weekly column "Quick Tip." I'll show you how to create some awesome effects using Adobe Creative Suite and other tools. My column also discusses how journalists can use these graphics in their videos.
When I started out in motion graphics, I thought Adobe After Effects had to have a shortcut for making text write itself.
It's a really popular effect after all. Think back to the Looney Tunes animated series and you can probably visualize the words "That's all Folks!" being written on screen.
When I started out in motion graphics, I thought Adobe After Effects had to have a shortcut for making text write itself.
It's a really popular effect after all. Think back to the Looney Tunes animated series and you can probably visualize the words "That's all Folks!" being written on screen.
Well, there's no shortcut. However, a bit of creative thinking can solve just about any problem in Adobe After Effects. That and money for templates. As journalists, we don't have that sort of dough.
Let's get to it.
Let's get to it.
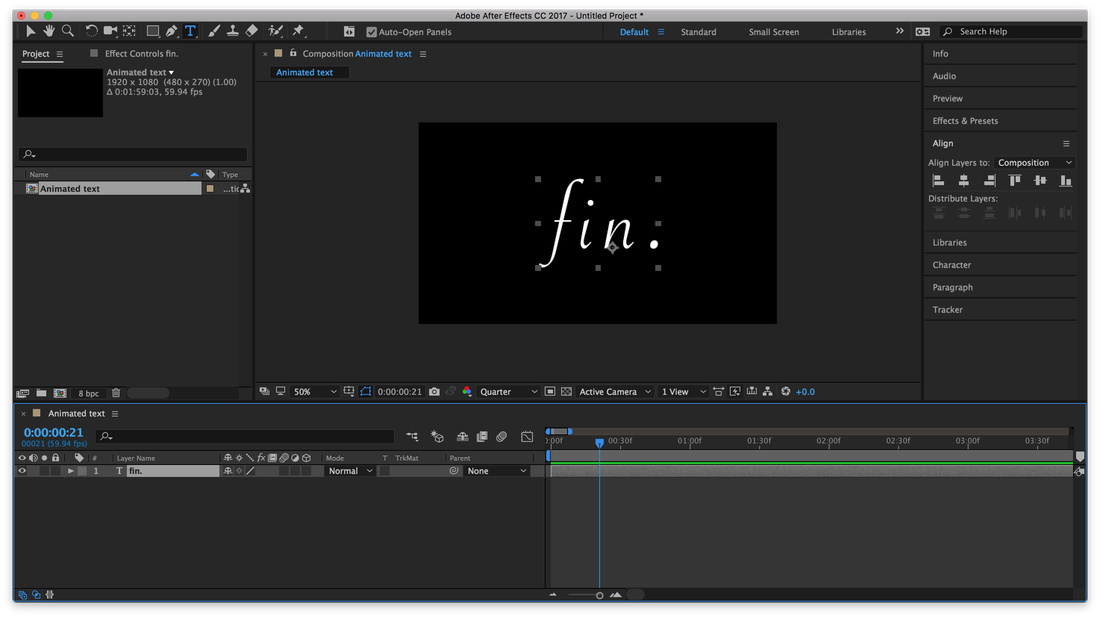
The first thing you'll want to do is, of course, start a New Composition and and use the Horizontal Type Tool to write something out. Here, our text reads "fin." like how I imagine a highfalutin French art film would conclude.
You'll then want to trace out each of the letters, making sure that the width of your lines covers the entire word. To do this, use the Pen Tool to make points all along the length of the letters.
Try it out on the first letter and name that Shape Layer "f." You will need to make separate Shape Layers for each word and symbol.
Since we only need the Stroke, go ahead and delete the Fill. To do this, click on the arrow next to the "f" layer. Then click on the arrows next to Contents and then Shape 1. Highlight Fill 1 and delete it.
|
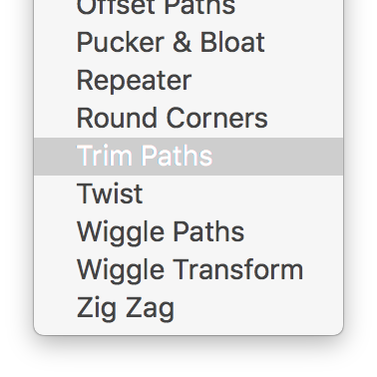
You will then need to click on the arrow to the right of Contents, the one with the words "Add:" next to it. Select Trim Paths in the menu that appears, as in the picture to the left.
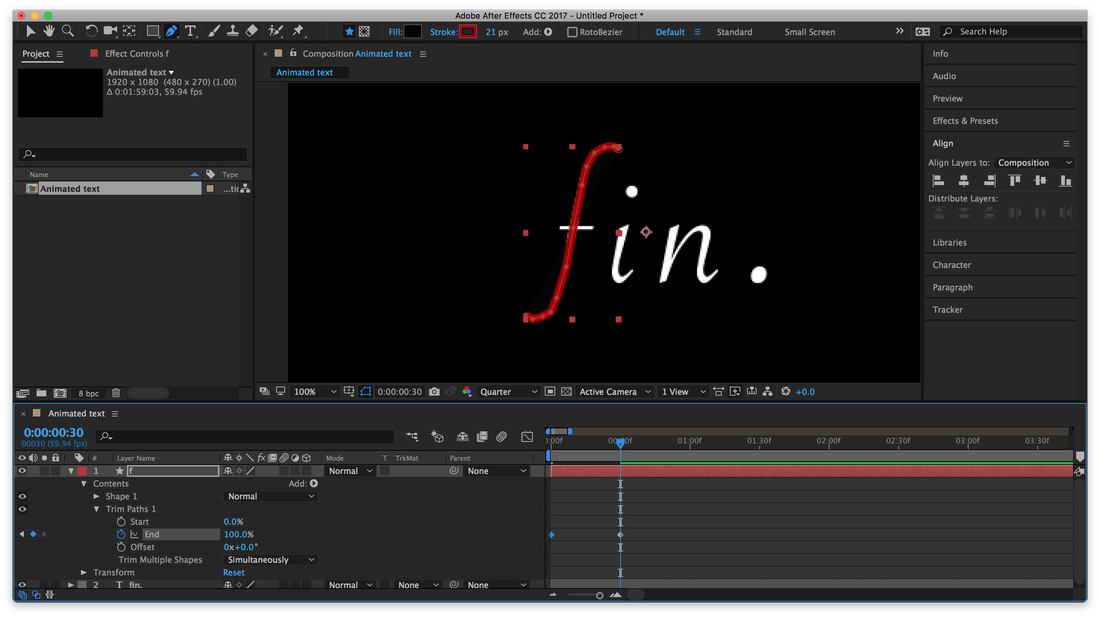
You will now have a "Trim Paths 1" option under your Contents for the "f" layer. |

Click on the arrow next to "Trim Paths 1" and you'll see End and Start. You'll find that these options determine how much of the "f" outline is drawn out. For example, only half of our "f" Shape Layer will be illustrated if we set either End or Start to 50 percent.
For this exercise, set down keyframes for just End at 0 and 100 percent.
For this exercise, set down keyframes for just End at 0 and 100 percent.
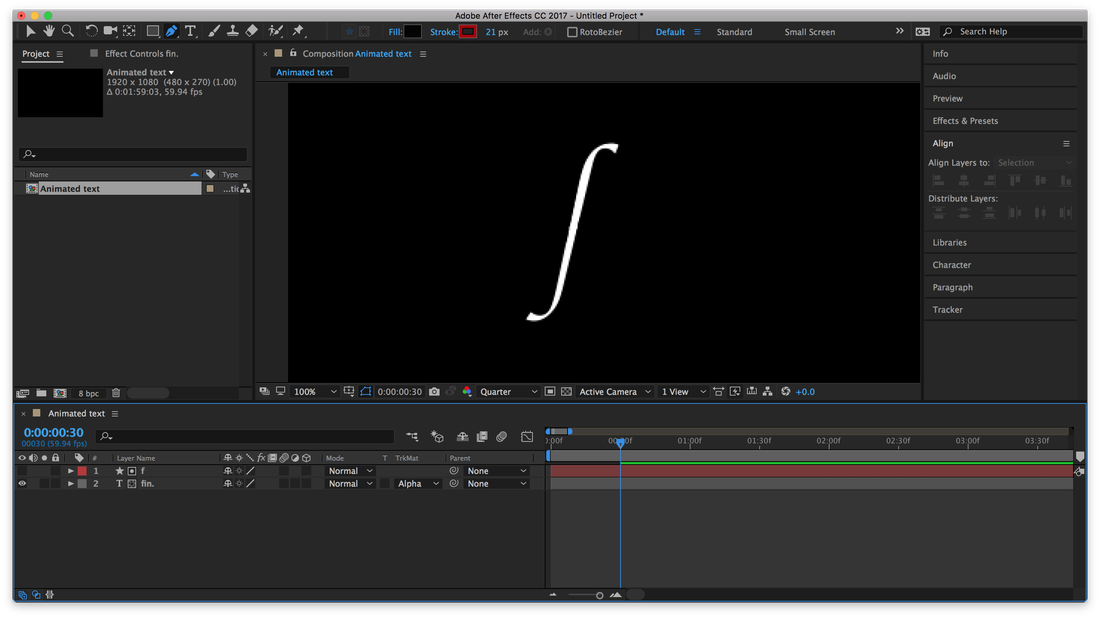
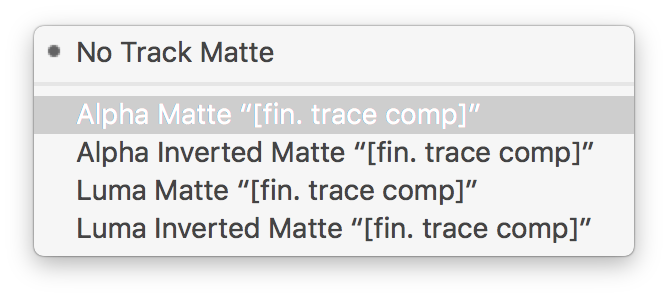
Make sure your text layer — the one with your full "fin." phrase — is beneath the "f" Shape Layer. Click on the menu option under the Track Matte column and select Alpha Matte "[f]." It should now only show the part of the text layer we traced in the "f" layer.
If nothing appears in your composition, move the slider in your timeline a few seconds forward after the last keyframe you set for End.
Once we render the animation out, it should look something like this.
If nothing appears in your composition, move the slider in your timeline a few seconds forward after the last keyframe you set for End.
Once we render the animation out, it should look something like this.
That's basically all there is to it. Trace out the rest of the letters and set down End keyframes for each of them.
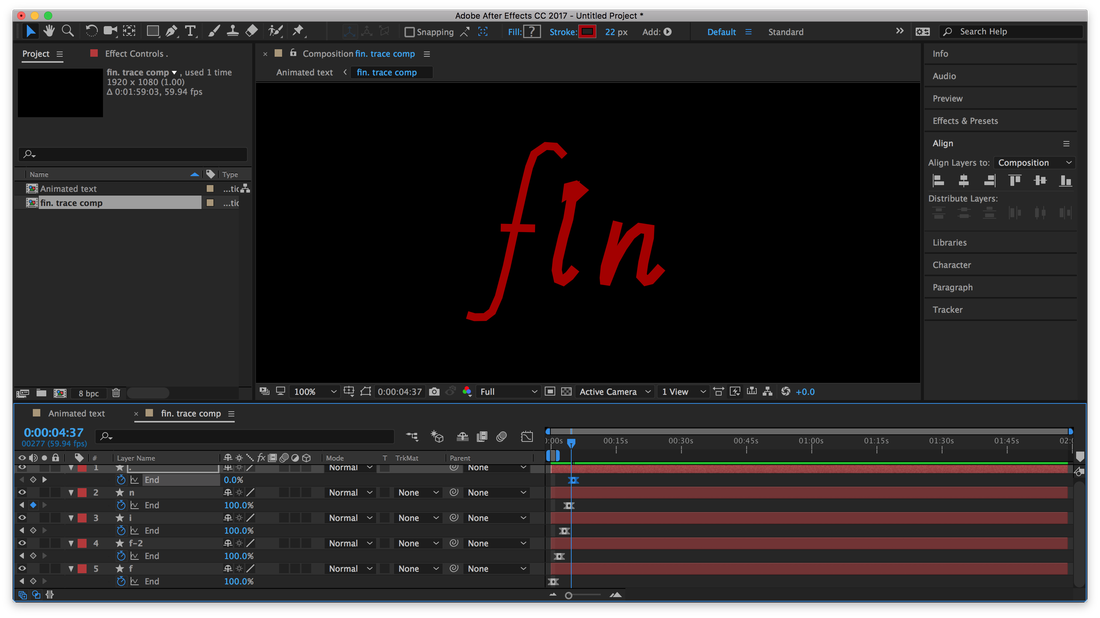
Once you're done, Precompose — that's taking layers and putting them in a separate composition — and name the layer "fin. trace comp." Then set the Track Matte for your text layer to Alpha Matte "[fin. trace comp]".
Once you render it all out, your animation should look like this.
It'll take a bit of work to make sure that your trace looks its absolute best.
If you need to adjust the width of your lines to fully cover the letters, click on your Shape Layers and adjust the Stroke Width.
If you need to reposition points in your trace, click on the arrows next to the Shape Layer and then Contents and then Shape 1 and highlight Path 1. This will show you all the points you set down for your trace, which appears as boxes in your composition. Click and drag the boxes to reposition them.
If you need to add new points, click and hold down the Pen Tool option in the top menu bar and select Add Vertex Tool. Click anywhere along the outline of your trace to add a new point. To delete a point, select the Delete Vertex Tool instead and click on any of the boxes.
That's it for this week's lesson. As always, I'll be back again next week for another quick tip.
 RSS Feed
